A Complete Guide to Finding Where Photos Were Taken
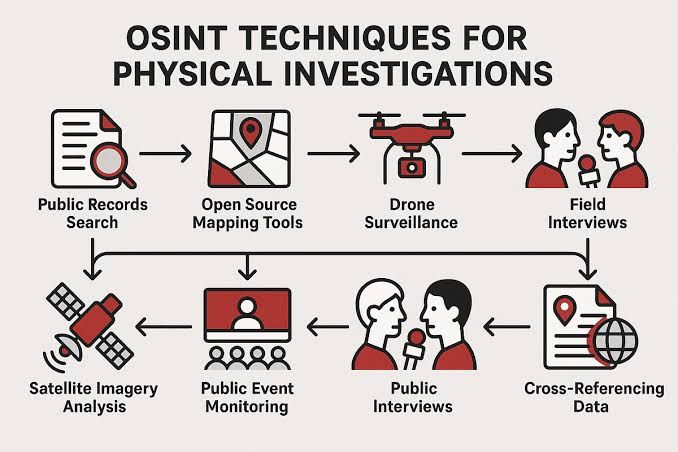
A single photograph. No caption, no metadata, no context. Just pixels on a screen. And from those pixels, an investigator needs to figure out where the image was taken — maybe a conflict zone, maybe a crime scene, maybe a viral social media post that could be misinformation. The clock is ticking, and accuracy matters more than speed. This is OSINT image geolocation: the practice of determining a photo's location using nothing but publicly available information and careful analysis. It's a discipline that journalists at Bellingcat have refined into a science, that human rights investigators use to document atrocities, and that fact-checkers rely on to debunk false claims. And in 2026, AI tools like GeoSpyhave dramatically lowered the barrier to entry — giving even non-specialists a powerful first-pass analysis tool. But AI alone isn't enough. The most reliable investigations combine AI speed with human reasoning, cross-referencing multiple sources until the evidence converges on a single, defensible conclusion. This guide walks through the complete workflow — from receiving an image to presenting a verified location — with the techniques, tools, and mental models that professional investigators use every day. If you're new to AI geolocation concepts, you may want to start with our technical deep dive on how AI photo geolocation works before diving into the investigative workflow below.
What Is OSINT Image Geolocation?
OSINT — Open Source Intelligence — refers to the practice of collecting and analyzing publicly available information to answer specific questions. Image geolocation is one subset: given a photograph, determine where it was taken.
What makes this "OSINT" rather than just "looking at a photo" is the methodology. A casual observer might glance at a photo and say "that looks like somewhere in Europe." An OSINT investigator will systematically extract every geographic signal from the image, cross-reference each signal against multiple external sources, build a hypothesis with documented evidence, and present a conclusion that could withstand scrutiny in a courtroom or a newsroom.
The process has four phases:
- Triage — Assess the image quality, extract any available metadata, and form an initial hypothesis
- Signal extraction — Catalog every geographic clue visible in the image
- Corroboration — Cross-reference each signal against external sources (maps, satellite imagery, street-level photos, databases)
- Convergence — Narrow down the location until multiple independent signals point to the same place
AI geolocation tools accelerate phases 1 and 2 — they can produce an initial location hypothesis in seconds and highlight visual signals that a human might overlook. But phases 3 and 4 still require human judgment, because AI can be wrong, and in investigative work, being wrong has consequences.
Phase 1: Triage — Your First 60 Seconds with an Image
When you receive an image for geolocation, the first minute sets the direction of the entire investigation. Here's what to do, in order.
Step 1: Check for Metadata
Before anything else, check whether the image contains EXIF metadata. This includes GPS coordinates, timestamps, camera model, and other technical data embedded in the file. If GPS data is present, your job might be done in 10 seconds.
You can check metadata using:
- ExifTool (desktop, free, command-line) — the gold standard for metadata extraction
- Metadata2Go (web-based, free) — quick online check without installing software
- Metapho (iOS) — for checking photos directly on your phone
Be aware that most social media platforms strip EXIF data on upload. If the image came from Instagram, Facebook, X, or WhatsApp, assume the metadata is gone. For a deeper understanding of what metadata reveals and how to work with it, see our complete guide to EXIF metadata and photo location data.
Step 2: Run an AI Geolocation Assessment
Upload the image to an AI geolocation tool like GeoSpy for an instant first-pass prediction. This gives you a starting hypothesis — a country, city, or region to focus your investigation on. The AI processes visual signals (architecture, signage, vegetation, terrain, street design) and returns a ranked list of likely locations with confidence scores.
Treat this as a lead, not a conclusion. AI geolocation tools achieve 75–95% accuracy on recognizable landmarks and major cities, but accuracy drops significantly for rural areas, indoor photos, or images with few distinctive features. Understanding how AI photo geolocation actually works will help you calibrate your trust in the AI's output.
Step 3: Reverse Image Search
Run the image through reverse image search engines to check if it already exists online. If someone has previously posted this photo with location context, that context could save you hours of work.
- Google Lens — best for landmarks and well-known locations
- Yandex Images — often superior for finding non-English language matches and identifying locations in Eastern Europe, Central Asia, and the Middle East
- TinEye — focuses on exact image matches rather than similar images; useful for finding the original source of a viral photo
If the reverse image search returns results, note the URLs where the image appears. These may provide location context, timestamps, or clues about the image's origin. For a detailed comparison of these methods, see our analysis of reverse image search versus AI geolocation.
Step 4: Form an Initial Hypothesis
Based on the metadata check, AI assessment, and reverse image search, write down your initial hypothesis. Something like: "Likely somewhere in coastal Morocco, based on architectural style and vegetation signals. AI suggested Casablanca region with 78% confidence. No prior online presence found."
This hypothesis is your working assumption. Everything from here on is about testing it — confirming or rejecting it through systematic investigation.
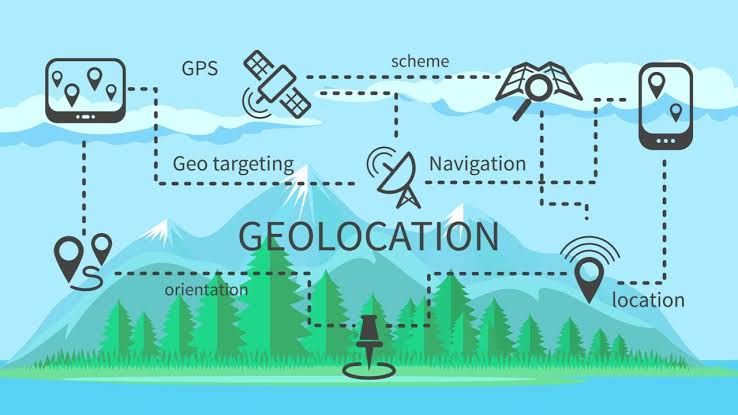
Phase 2: Signal Extraction — Reading the Image Like an Investigator
This is where the real work begins. A trained OSINT investigator can spend 30 minutes or more on a single image, cataloging every geographic signal before moving to corroboration. The goal is to build a comprehensive list of clues, each of which narrows the possible locations.
Visual Signal Categories
Here are the signal categories that experienced geolocators systematically check:
Architecture and Building Style
Buildings are among the most location-specific elements in any photo. The materials, construction techniques, roof shapes, window designs, and decorative elements all follow regional patterns shaped by climate, culture, and history.
- Roof type: Flat Mediterranean roofs versus steep Nordic pitched roofs versus Korean hanok curved roofs — each constrains the geography significantly
- Construction materials: Adobe in the American Southwest and North Africa, red brick in the UK and Northeastern US, stucco in Latin America and Southern Europe
- Building density and setback patterns: How close buildings are to each other and to the street varies by urban planning tradition
- Architectural era: Soviet-era housing blocks, Haussmannian Parisian apartments, American suburban ranch houses — each points to a specific region and era
Language and Script
Any visible text — street signs, storefront signage, billboards, license plates, graffiti — is a powerful geographic signal.
- Script type: Latin, Cyrillic, Arabic, Chinese, Japanese, Korean, Devanagari, Thai — each immediately narrows the search to specific countries
- Language within a script: Spanish versus Portuguese versus Italian (all Latin script but orthographically distinct)
- Sign design and color: Road sign colors, shapes, and fonts follow national standards. A yellow diamond warning sign is used in the US and Australia but not in Europe. A blue circular sign with a red border is uniquely European.
- License plates: Plate color, format, and font are country-specific. Even partial visibility of a plate can identify the country.
Vegetation and Terrain
The natural environment provides climate-zone signals that constrain geography at a continental scale.
- Tree species: Palm trees suggest tropical or subtropical climates; olive trees suggest the Mediterranean; birch suggests northern latitudes
- Terrain type: Desert, tropical rainforest, alpine, coastal, savanna — each eliminates large portions of the map
- Soil color: Red laterite soils in tropical regions, white chalk in southern England, black volcanic soil in Iceland
- Sky and weather: The angle of the sun (which indicates latitude if the time and date are known), cloud types, and air clarity all carry geographic information
Infrastructure and Street Design
The way roads, utilities, and public infrastructure are built varies enormously by country and era.
- Road markings: Lane line colors and patterns differ by country. White lines are standard in most of Europe; yellow center lines are used in the US, Canada, and Australia.
- Utility poles: Design, material (wood versus concrete versus metal), and configuration (overhead versus underground) follow regional patterns.
- Traffic light design: Horizontal versus vertical mounting, the presence of a red-amber phase before green (common in the UK and Germany but not in the US)
- Pedestrian infrastructure: Sidewalk materials, curb designs, crosswalk markings — all follow local standards
Shadows and Sun Position
If you know the date the photo was taken (from metadata or context), the length and direction of shadows can determine the latitude. The NOAA Solar Calculator and tools like SunCalc allow you to input a date and shadow angle to calculate the sun's position — which constrains the possible latitudes.
This technique, known as chronolocation, is particularly powerful for images from conflict zones where the date of an event is often known from news reports.
For a more detailed walkthrough of how to read each of these visual signals — with annotated examples — see our guide on how to manually geolocate a photo.
Common Pitfalls in OSINT Image Geolocation
Even experienced investigators make mistakes. Here are the most common ones to watch for:
1. Confirmation Bias
Once you form a hypothesis, you tend to notice evidence that supports it and overlook evidence that contradicts it. Counter this by actively searching for disconfirming evidence — if your hypothesis is "this photo was taken in Morocco," deliberately look for signals that might indicate Tunisia or Algeria instead.
2. Over-Reliance on a Single Signal
A single signal — one street sign, one building, one tree species — is never sufficient. A sign in Arabic could be in any of 20+ countries. A palm tree grows in both Miami and Dubai. Always seek multiple, independent signals that converge on the same location.
3. Ignoring Image Manipulation
Before investing hours in geolocation, verify that the image hasn't been manipulated. Check for signs of digital editing using tools like Forensically (error level analysis, clone detection). A manipulated image may contain real geographic signals from multiple locations, stitched together to mislead.
4. Assuming the AI Is Right
AI geolocation tools are impressive, but they're not infallible. They can hallucinate confident-sounding predictions for images that contain few genuine geographic signals. Always verify AI predictions with manual analysis. Our how it work page addresses common questions about AI geolocation accuracy and limitations.
Building Your Geolocation Skills
OSINT image geolocation is a learnable skill. Like any skill, it improves with deliberate practice. Here are ways to build your expertise:
- Practice with GeoGuessr — the game drops you at a random Street View location and challenges you to identify where you are. It's an excellent way to build pattern recognition for global architectural, infrastructural, and environmental signals.
- Follow Bellingcat investigations — their published case studies walk through real geolocation investigations step by step, showing the reasoning behind each conclusion
- Join the OSINT community — communities like the OSINT Curious Discord and r/OSINT on Reddit provide opportunities to practice, learn from others, and get feedback on your analysis
Is OSINT image geolocation legal?
Do I need special training to do OSINT geolocation?
What should I do if I can't geolocate a photo?
Start Your Geolocation Investigation
The fastest way to begin is with a free AI assessment. Upload your photo to GeoSpy — no signup, no cost, no data retention — and use the AI's prediction as your starting hypothesis. From there, apply the systematic workflow above to verify, cross-reference, and converge on a defensible conclusion.