Where Was This Photo Taken? Here's How to Actually Find Out
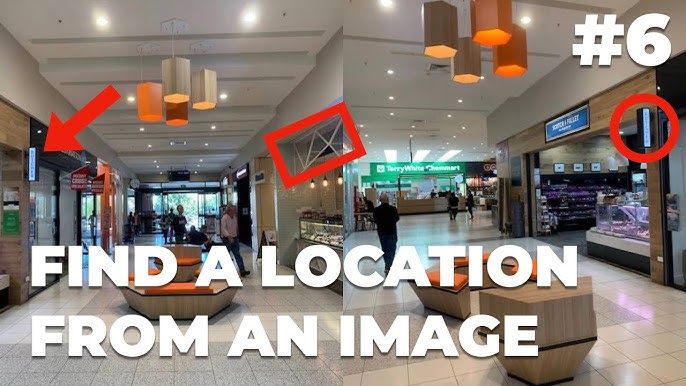
You see a photo. Maybe it's a sunset someone posted with no caption. Maybe it's an old family print with nobody left to ask. Maybe it's an image going around online and you want to know if the location in the story matches the location in the picture. One question sits in your head: where was this photo taken?
Good news — there's almost always a way to get an answer. Which way depends on what kind of photo you're holding. Some photos basically tell you themselves. Others need a bit of detective work. A few need a computer to stare at the pixels for you.
This guide walks through all four practical routes, in the order you should actually try them. None require you to be a tech wizard, and at least one of them needs zero metadata and zero prior posting history. By the end you'll know exactly which tool to grab for the photo in front of you.
First, the five-second check most people skip
Before you do anything fancy, look at the photo's hidden data. A lot of photos — especially ones taken on a phone with location services on — quietly carry GPS coordinates inside the file. That data lives in something called EXIF metadata, and if it's there, you're done in seconds.
Here's the catch most people run into: sharing apps delete this data. When you send a photo through WhatsApp, post it to Instagram, or screenshot it, the GPS usually gets stripped. So this trick works great on photos straight off your own camera roll, and poorly on photos you downloaded from the internet.
If you want to check, you don't need special software. On a Mac, open the image in Preview and hit ⌘I. On Windows, right-click, properties, details. Or drop it into a tool like ExifTool and look for "GPS Position." If you see numbers like 48.8584, 2.2945, that's a pin on the map — congrats, you found it.
For a deeper look at what your photos reveal and how to scrub it before sharing, our EXIF metadata guide covers the whole thing.
When there's no metadata: let the internet find a match
Say the GPS is gone (it usually is). Your next move is reverse image search. The idea is simple: you upload the photo, and the search engine compares it against billions of images it has already indexed. If your exact photo — or a near-identical one — exists somewhere online with a caption, you've likely found your location.
Three engines are worth knowing:
- landmarks. Point it at the Eiffel Tower or a recognizable skyline and it'll name the place instantly.
- Yandex Images pulls matches Google misses, especially across Eastern Europe, Central Asia, and parts of Asia. If Google comes back empty, Yandex is the engine to try next.
- TinEye doesn't look for similar photos — it hunts for exact copies and shows you the earliest one it can find. That makes it the best choice when you're trying to trace where an image originally came from.
The honest limitation: reverse image search only works if the photo has been posted online before. A never-published original? It'll return nothing. A cropped screenshot from a friend's story? Probably nothing useful. That's where the next method earns its keep.
If you want the full breakdown of how these engines compare to AI, our reverse image search vs AI geolocation guide goes deep.
The method that works on screenshots and originals: AI geolocation
This is the one most people haven't tried yet, and it's the reason a tool like GeoSpy exists. Instead of hunting for a copy of your photo online, AI geolocation looks at the content of the photo — the buildings, the vegetation, the road markings, the language on signs, the angle of the sunlight — and predicts where in the world that scene most likely sits.
It doesn't need GPS. It doesn't need the photo to exist anywhere online. You can upload a screenshot, a scanned old print, or something you shot yourself, and the AI will take its best guess in a few seconds.
Here's what happens under the hood when you drop a photo into GeoSpy:
- The model picks out the geographic signals — architecture style, types of trees, the script on a distant sign, the color of the soil, the shape of the streetlights.
- It matches those signals against patterns it learned from millions of geotagged photos.
- It hands back a location estimate with a confidence score, so you know how much to trust it.
The thing I like about this approach is that it fills the gap the other methods leave open. No metadata? Fine. Photo never posted online? Also fine. It just reads the picture.
Try it yourself — upload a photo to GeoSpy and you'll get a prediction with no signup and no cost. For the curious, our technical explainer on how AI photo geolocation works breaks down the pipeline step by step.
For the stubborn ones: read the clues yourself
Sometimes you want to verify a result, or the AI isn't confident, or you just enjoy the puzzle. That's when manual geolocation comes in — and it's more learnable than you'd think.
Every photo carries a geographic fingerprint made of small signals. None of them alone proves a location, but stacked together they narrow the world down fast:
- Architecture tells you about climate and culture. Flat roofs vs steep pitched roofs. Red brick vs stucco. The way buildings sit relative to the street.
- Language and script are gold. Cyrillic, Arabic, Chinese characters, Hangul, Devanagari — each one wipes out most of the planet. Even within Latin script, "Farmacia" vs "Pharmacie" vs "Apotheke" tells you the country.
- Vegetation and terrain work at a continental scale. A saguaro cactus means the Sonoran Desert. Baobab trees mean sub-Saharan Africa. Red laterite soil points to tropical regions.
- Infrastructure follows national standards. Which side of the road has the yellow center line. How license plates are formatted. What the mailboxes look like.
- Shadows can even reveal latitude if you know the date the photo was taken — a technique called chronolocation.
The mindset that works: don't ask "where is this?" Ask "where could this not be?" You eliminate possibilities until only one region survives. Our manual geolocation guide walks through each signal category with examples, and it's a genuinely fun skill to build. (GeoGuessr is a good way to practice without leaving your chair.)
Which method should you actually use?
Here's the part that saves you time. Match your photo to a scenario:
| Your photo is… | Start with | Then | |
|---|---|---|---|
| Straight off your phone location on | EXIF check | Done — read the GPS | |
| A famous landmark or monument | Google Lens | Instant name + context | |
| Something you suspect was posted online | Yandex + TinEye | Find the original source | |
| A screenshot old print or original never posted | GeoSpy AI | Get a prediction then verify | |
| A generic street with no landmarks | GeoSpy AI | AI reads the subtle clues | |
| Something you need to be sure about | Any of the above | Cross-check with Street View |
The most reliable habit is to combine methods. Run a reverse search, get an AI guess, then confirm with Street View or Google Earth. When two independent approaches point to the same place, your confidence is real — not hoped-for.
How accurate is this, really?
Straight talk, because overselling helps nobody. These tools give you strong likelihoods, not court-proof facts.
- Famous landmarks: near-certain with any method.
- Major cities with distinctive architecture: usually right, often to the neighborhood.
- Rural or generic scenes: iffy. Fewer unique signals means wider guesses.
- Indoor shots or close-ups of objects: weak. There's just not enough world in the frame.
GeoSpy shows a confidence score for a reason — pay attention to it. A "high confidence, central Paris" is a very different animal from a "low confidence, possibly Mediterranean." For anything that matters — a news verification, a legal context — treat the result as a lead to confirm, not a conclusion to quote.
One thing about your own photos
While you're learning to find where other people's photos were taken, it's worth remembering the mirror image: your own photos may be quietly locatable too. That GPS data in EXIF, the landmarks in your vacation shots, the clues in your daily life — they all add up. If you share images publicly, consider stripping metadata first, especially from photos taken at home or anywhere personal.
Our privacy guide goes into what gets revealed and how to stay in control. GeoSpy itself processes images in memory and discards them after — nothing is stored or used for training — but it's smart to think about any tool you upload to.
Can you find where a photo was taken if it has no metadata?
What app tells you where a photo was taken?
How do I find where a picture was taken without the internet?
Is photo geolocation accurate enough to trust?
Why would I want to know where a photo was taken?
Start with one photo
The fastest way to see this work is to try it. Grab a photo you're curious about, upload it to GeoSpy, and read the prediction. Then, if you want to go deeper, run a reverse search or work through the visual clues yourself. Most people are surprised by how much geographic information is sitting in a picture they've looked at a hundred times.